
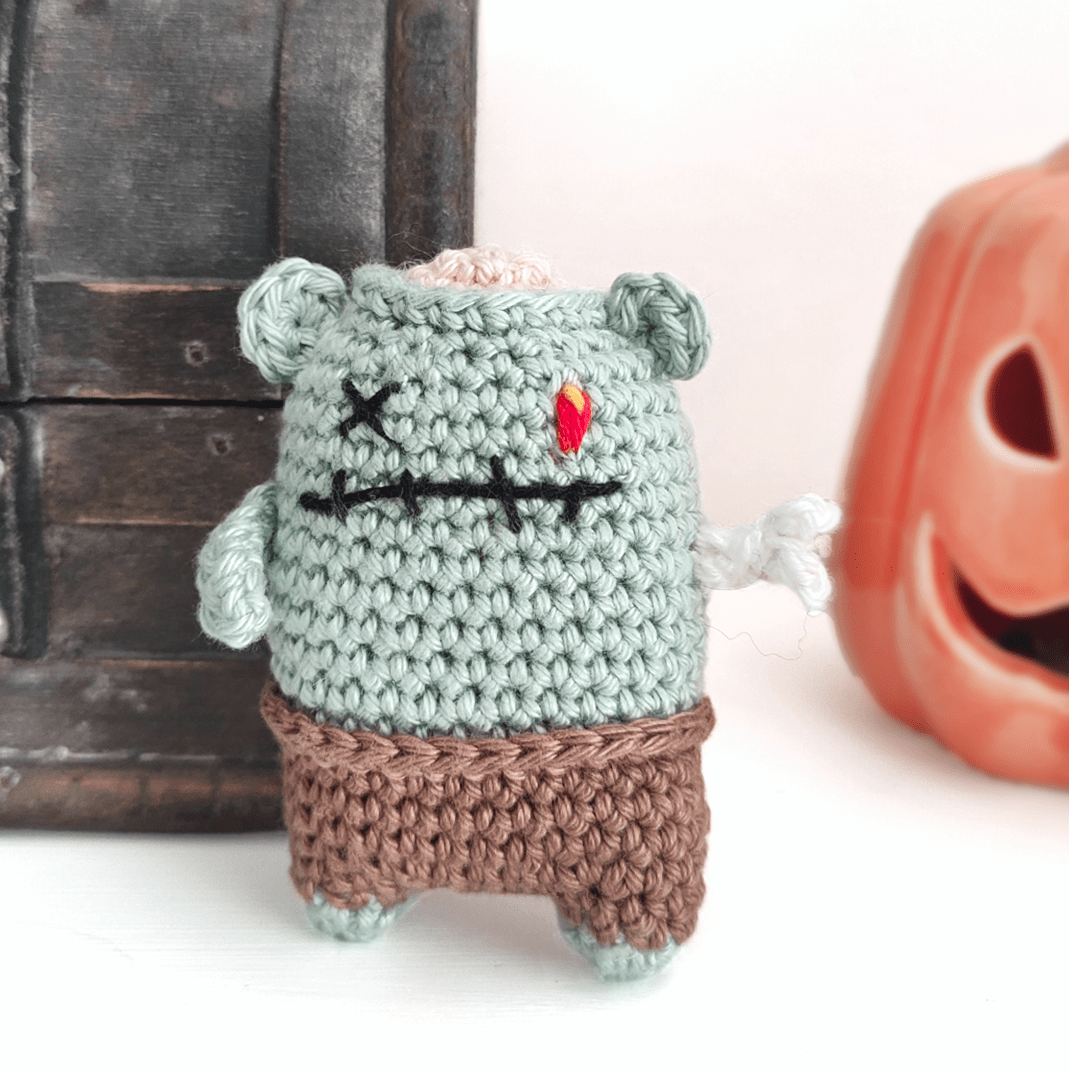
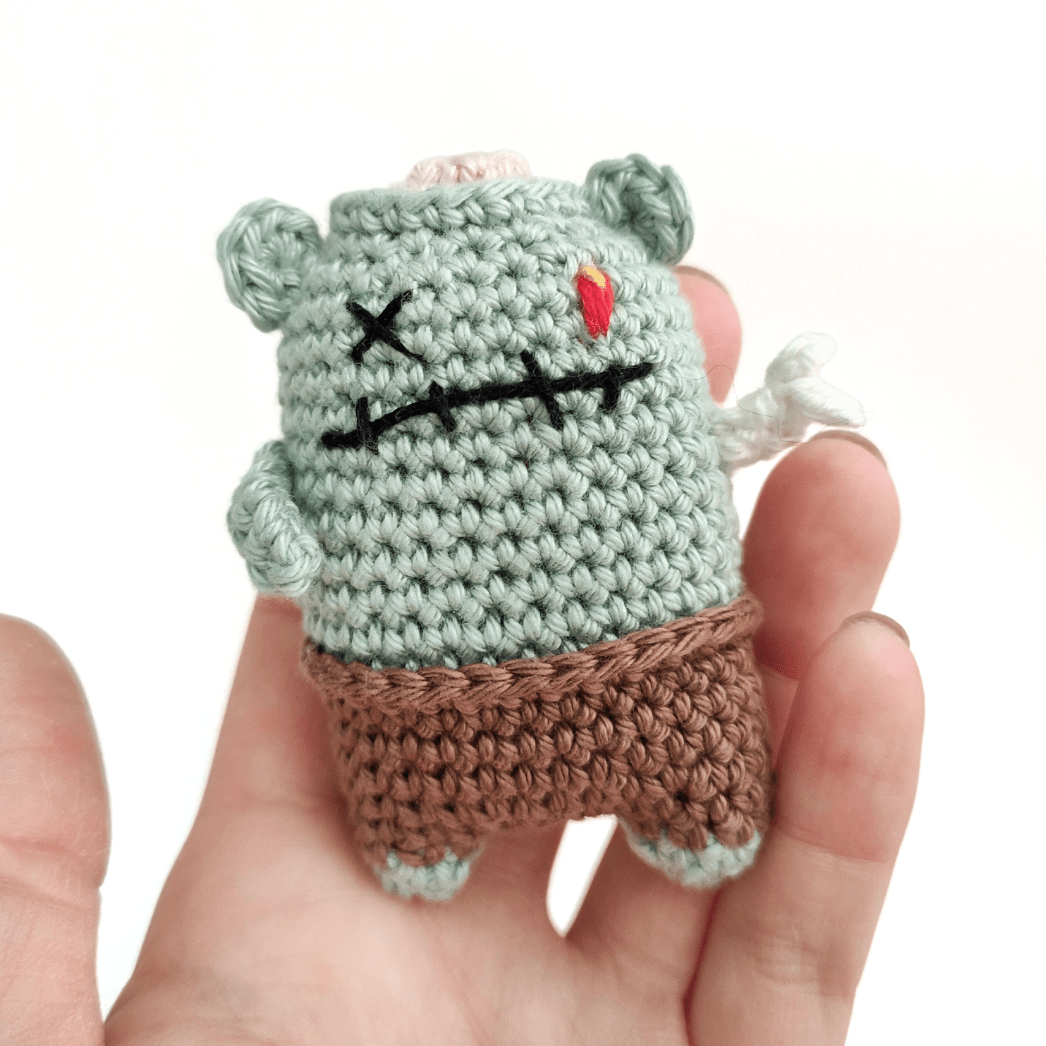
Questo schema amigurumi è l’ultimo del trio di quest’anno dedicato a Halloween.
Realizzeremo un piccolo orsetto zombie, come al solito si tratta di un progetto facile e veloce da fare.
Puoi trovare gli altri 2 progetti qui:
Bottiglie di veleno | Poison bottles: https://toffoletta.com/2022/09/15/bottiglie-di-veleno-poison-bottles
Jasper il corvo | Jasper the raven: https://toffoletta.com/2022/09/29/jasper-il-corvo-jasper-the-raven
Iniziamo!
Click here for the ENGLISH VERSION (you can find it by scrolling at the bottom)
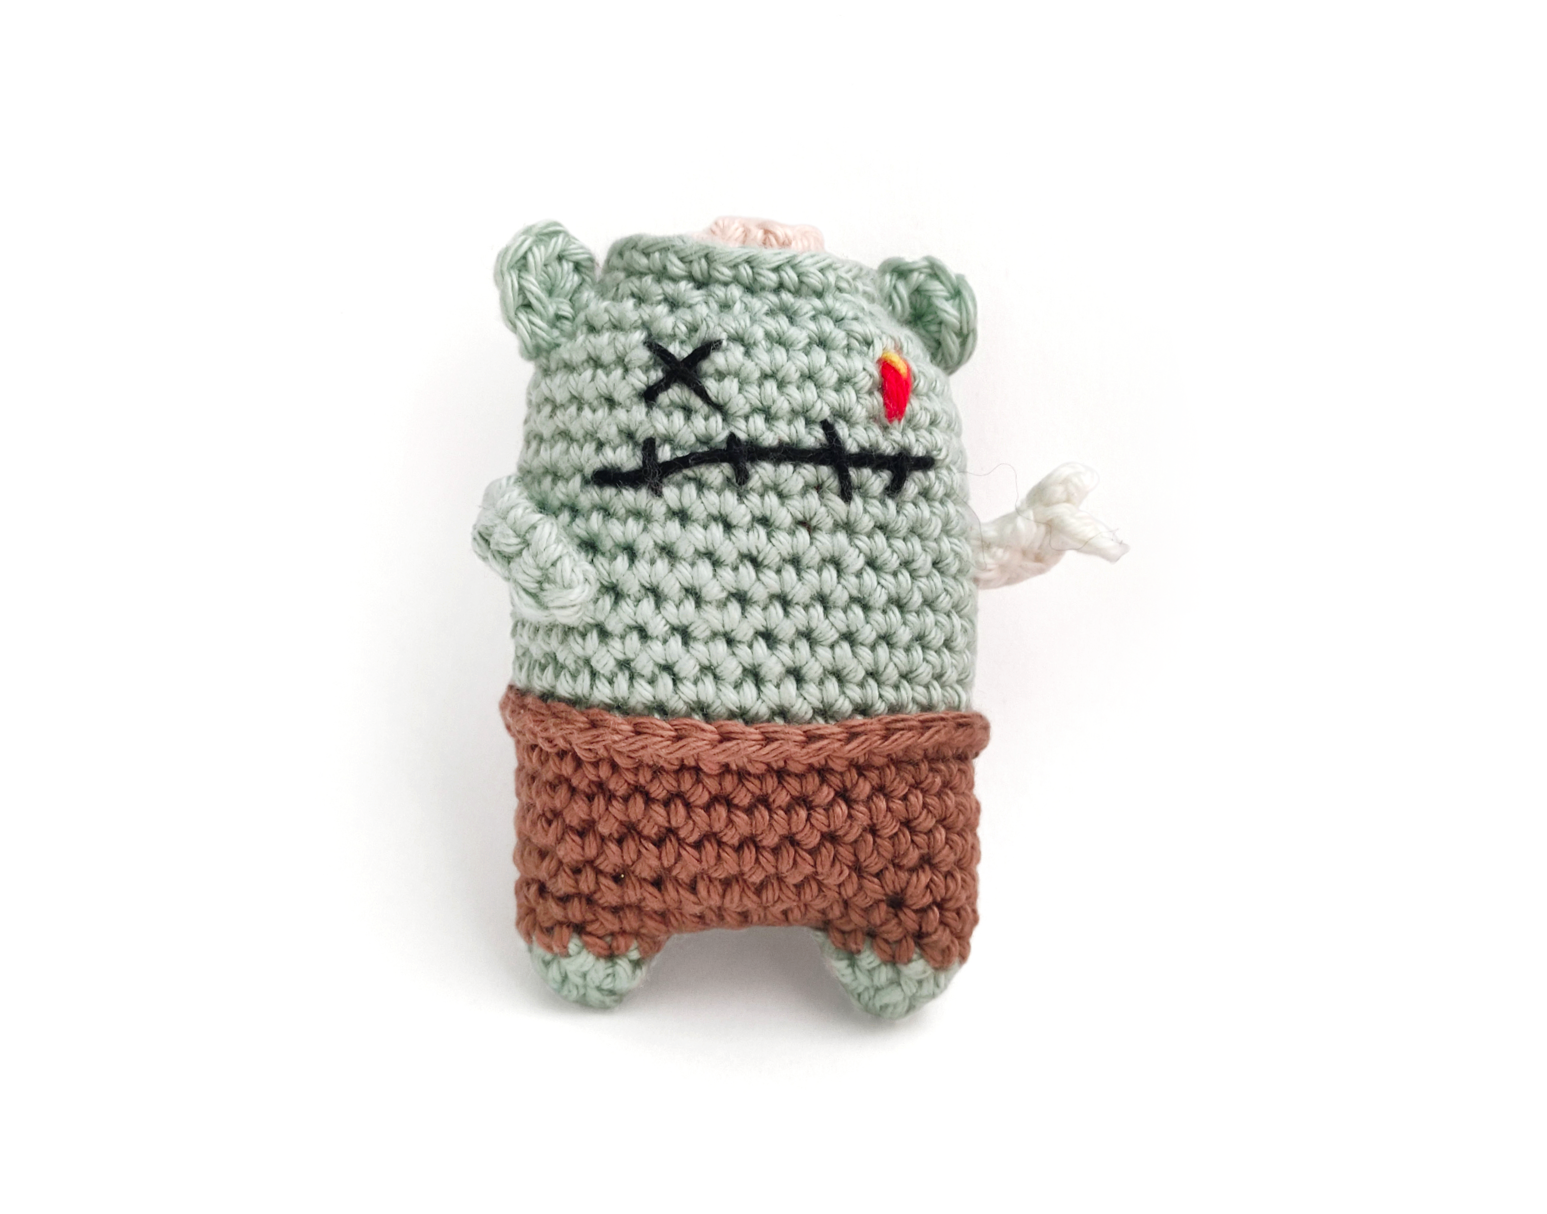
Dimensioni: con questo schema otterrai un orsetto zombie alto circa 8 cm (utilizzando il filato e l’uncinetto indicati)
Difficoltà: Principiante avanzato, questo schema è adatto a chi ha già realizzato qualche amigurumi
Punti utilizzati e abbreviazioni:
- cerchio magico: CM
- cat: catenella
- mb: maglia bassa
- aum: aumento
- dim: diminuzione invisibile
- mbs: maglia bassissima
- (…)x … volte: ripetere la sequenza tra parentesi
il numero di volte indicato - tot: indica il totale delle maglie di ogni giro
Materiali:
- uncinetto n. 2,75 mm
- filato di cotone nei colori marrone, verde pallido, rosa chiaro e avorio (pochi grammi) e una piccola quantità di filo di colore nero, rosso e giallo per ricamare occhi e bocca
- imbottitura in poliestere
- ago, forbici e segnapunti
Info aggiuntive
Lo schema è realizzato con la lavorazione in tondo a spirale.
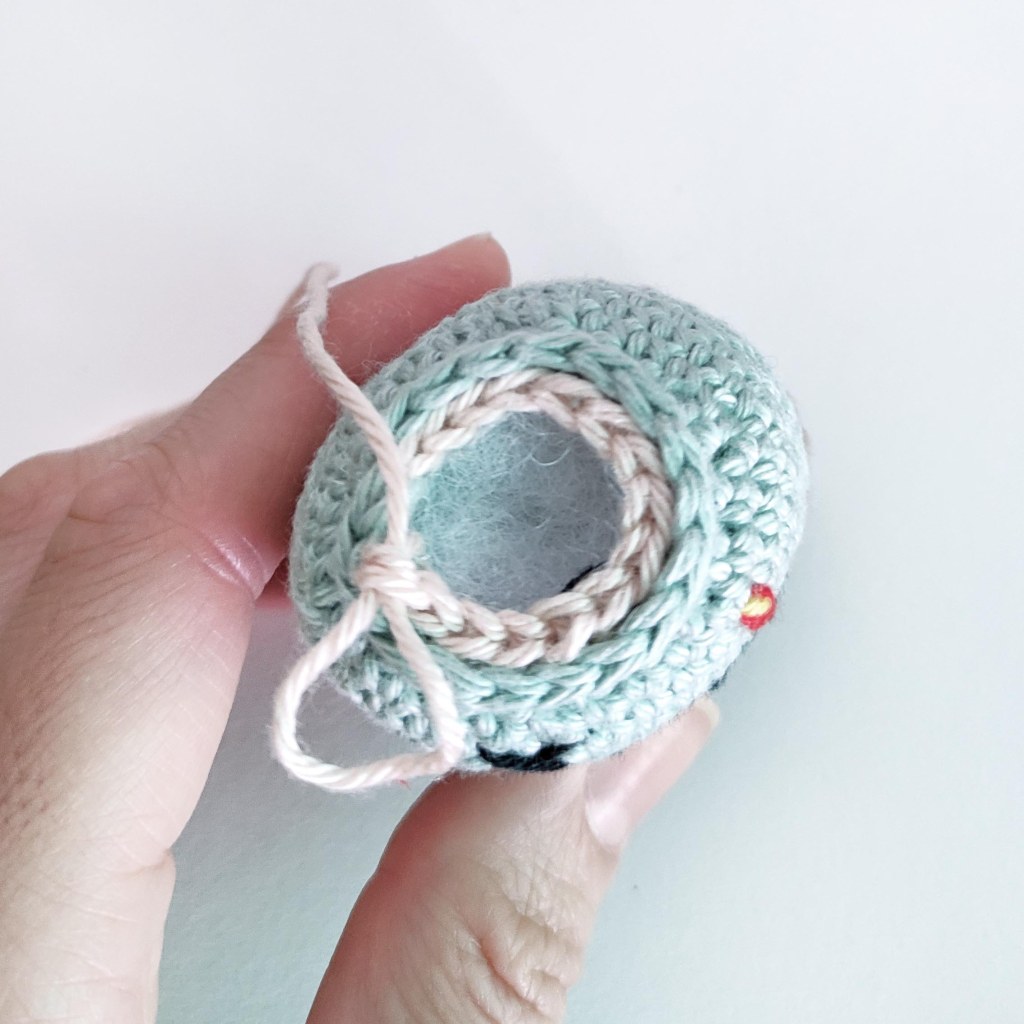
il corpo è realizzato in un unico pezzo, iniziando dalle gambe e arrivando alla testa. Le braccia e le orecchie sono realizzate a parte e poi cucite al corpo.
Per realizzare questo schema ho usato il cotone Catania Schachenmayr (https://schachenmayr.com/en/yarns/catania)
CORPO
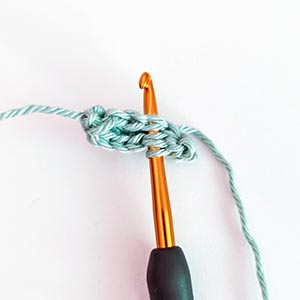
1. Con il filo di colore verde pallido: 6 mb nel CM
2. (2 mb, 1 aum) x 2 volte: tot 8
Chiudere e tagliare il filo e nascondere la coda, ripetere una seconda volta i giri 1 e 2 senza tagliare il filo, in modo da ottenere la seconda gamba.
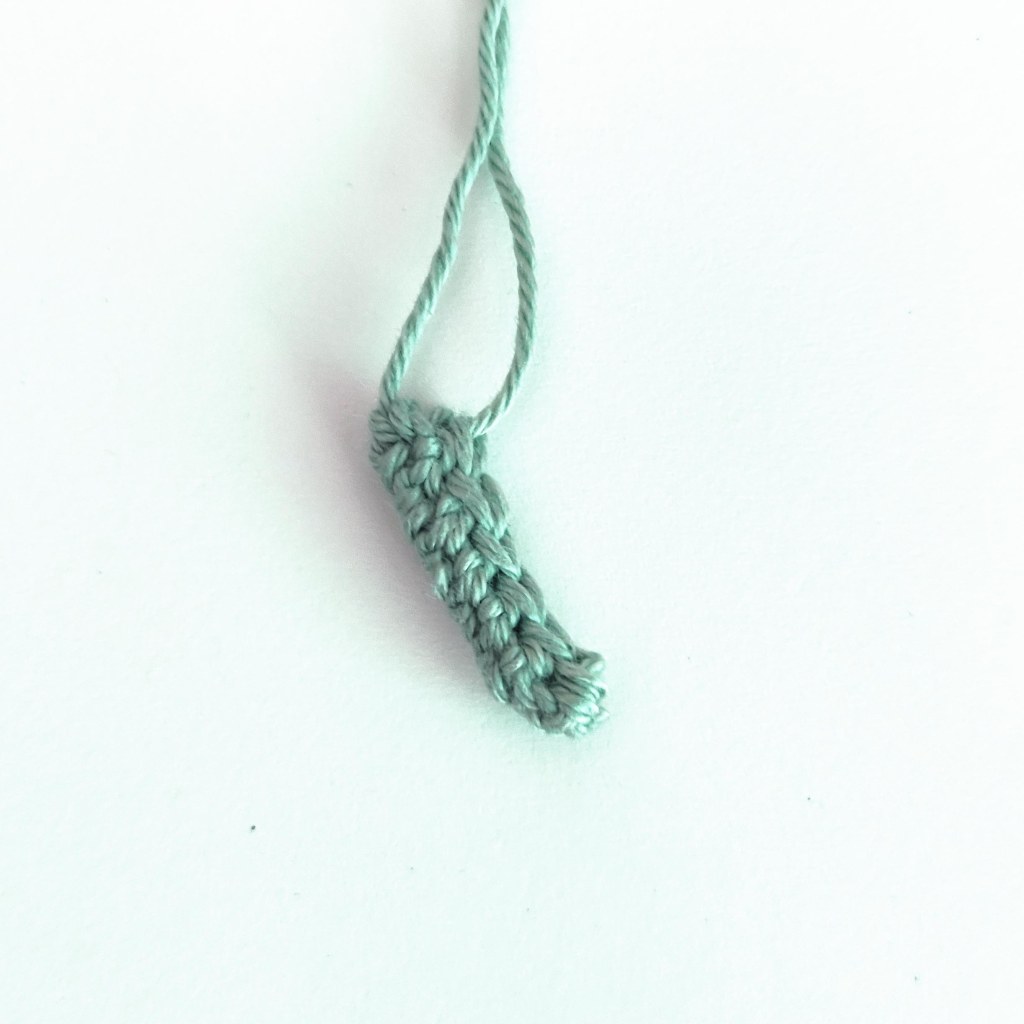
3. Cambiare con colore marrone: Lavorare 4 cat e inserire l’uncino nell’ultima maglia del giro 2 della prima gamba. 8 mb sulla prima gamba, 4 mb su un lato delle cat, 8 mb sulla seconda gamba, 4 mb sull’altro lato delle catenelle: tot 24
4. 24 sc
5. (3 mb, 1 aum) x 6 volte: tot 30
6-8. 30 mb (3 giri)
9. Solo nell’asola davanti: 30 mb
10. Cambia con verde pallido: 30 mb nell’asola non lavorata delle maglie del giro 8
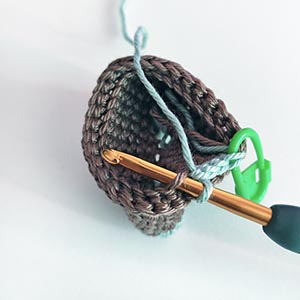
11-20. 30 mb (10 giri)
21. (3 mb, 1 dim) x 6 volte: tot 24
22. (2 mb, 1 dim) x 6 volte: tot 18
23. Solo nell’asola davanti: 18 mb
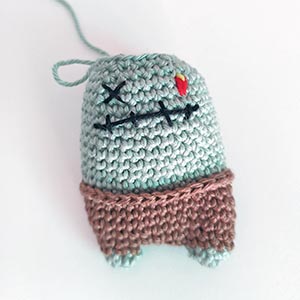
Ricamare gli occhi tra i giri 19 e 20 lasciando circa 4 maglie tra loro.
Ricamare la bocca subito sotto gli occhi realizzando una linea leggermente storta che va da un occhio all’altro e aggiungere delle linee verticali a piacere.
Divertiti a personalizzare l’espressione del muso come preferisci rendendolo buffo e spaventoso.
Imbottire gambe e corpo
24. Cambia con rosa pallido: (4 mb, 1 dim) per 3 volte nell’asola non lavorata del giro 22: tot 15
25. (3 mb, 1 dim) x 3 volte: tot 12
26. 1 dim per tutto il giro: tot 6
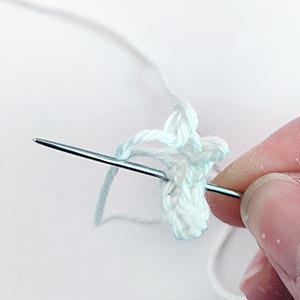
Chiudere lasciando del filo per cucire. Infilare l’ago e entrare in ognuna delle asole davanti delle 6 maglie e tirare il filo, poi nasconderlo all’interno.
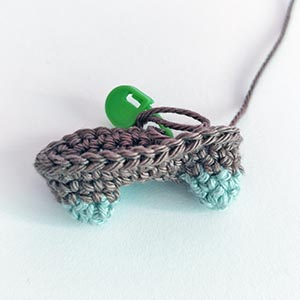
BRACCIO
1. Con il filo di colore verde pallido: 7 cat
2. Partendo dalla seconda cat dall’uncino: 6 mb, continua sull’altro lato delle catenelle lavorando altre 6 mb
3. Piegare il braccio a metà e unire i 2 lati lavorando 6 mbs nelle maglie di entrambi i bordi
Chiudere lasciando del filo per cucire.
BRACCIO-OSSO
1. Con il filo di colore avorio: 3 cat
2. Partendo dalla seconda cat dall’uncino: 2 mb, continua sull’altro lato delle catenelle lavorando altre 2 mb
3. Piegare a metà e unire i 2 lati lavorando 2 mbs nelle maglie di entrambi i bordi
Ora lavoriamo le 2 estremità dell’osso:
(3 cat, 1 mbs nella prima cat) per 2 volte
Chiudere lasciando del filo per cucire e fissare bene con l’ago le due estremità all’osso
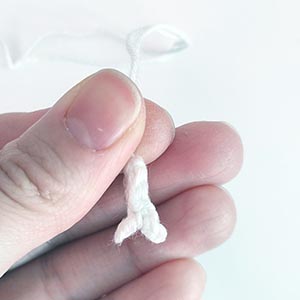
Poi trasportare il filo all’interno delle maglie portandolo all’estremità opposta, dove verrà cucito al corpo
ORECCHIE (2 pezzi)
1. Con il filo di colore verde pallido: 6 mb nel CM
Chiudere lasciando del filo per cucire.
ASSEMBLAGGIO
Cucire le orecchie tra i giri 21 e 23.
Cucire le braccia tra i giri 15 e 16.
Abbiamo terminato!
ENGLISH VERSION
zombie bear amigurumi pattern
This amigurumi pattern is the latest in this year’s trio dedicated to Halloween.
We will make a little zombie bear, as usual this is a quick and easy project to do.
You can find the other 2 Halloween projects here:
Poison bottles: https://toffoletta.com/2022/09/15/bottiglie-di-veleno-poison-bottles
Jasper the raven: https://toffoletta.com/2022/09/29/jasper-il-corvo-jasper-the-raven
Let’s go!
Dimensions: with this pattern you will get a little zombie bear about 8 cm/3 inches high (using the yarn and crochet indicated)
Difficulty: Beginner/Intermediate, suitable for those who have already made some amigurumi
Terms (US terminology)
- MR: magic ring
- ch: chain
- sc: single crochet
- inc: increase
- dec: invisible decrease
- sl st: slip stitch
- st(s): stitch(es)
- (…)rep…times: repeat stitches within brackets x times
- R: round(s)
- FLO: crochet only in the front loop
Materials:
- hook n. 2,75 mm
- brown, pale green, pale pink and off-white cotton yarn (a few grams)
- a small amount of black, yellow and red yarn for the eyes
- pins, yarn needle, scissors and stitch marker
- fiberfill for stuffing
Additional info
I worked in continous rounds.
The body is made in one piece, starting from the legs and arriving at the head. The ears and the arms are worked separately and then sewn onto the body.
To make this zombie bear I used Catania Schachenmayr cotton yarn, but of course you can use the colors and yarn you prefer.
(https://schachenmayr.com/en/yarns/catania)
BODY
R1. Using pale green yarn: 6 sc in MR (magic ring)
R2. (2 sc, 1 inc) rep 2 times (8)
Fasten off and trim the yarn, repeat a second time R1 and R2 without cutting the yarn to get the second leg.
R3. Change with brown: 4 ch and insert the hook in the last st of R2 of the first leg. 8 sc on the first leg, 4 sc on the one side of ch, 8 sc on the second leg, 4 sc on the other side of ch (24)
R4. 24 sc
R5. (3 sc, 1 inc) rep 6 times (30)
R6-8. 30 sc (3 rounds)
R9. FLO: 30 sc
R10. Change with pale green: 30 sc in the unworked back loop of R8
R11-20. 30 sc (10 rounds)
R21. (3 sc, 1 dec) rep 6 times (24)
R22. (2 sc, 1 dec) rep 6 times (18)
R23. FLO: 18 sc
Embroider the eyes between rounds 19 and 20 leaving approx. 4 stitches between them.
Embroider the mouth just below the eyes making a slightly crooked line that goes from one eye to the other and add vertical lines as desired.
Have fun customizing the expression of the face as you like making it funny and scary.
Stuff the body
R24. Change with pale pink: (4 sc, 1 dec) rep 3 times in the unworked back loop of R22 (15)
R25. (3 sc, 1 dec) rep 3 times (12)
R26. 1 dec all around (6)
Fasten off leaving a end for sewing.
Thread the needle and use it to go through each front loop of the 6 sts and pull the thread to close the hole.
ARM
R1. R1. Using pale green yarn: 7 ch
R2. Starting from the second ch from hook: 6 sc, continue on the other side of the starting chains: 6 sc (12)
R3. Fold the arm in half and join the 2 edges: insert the hook in the stitches of both edges and work 6 sl st
Fasten off leaving a end for sewing.
ARM-BONE
R1. Using off-white yarn: 3 ch
R2. Starting from the second ch from hook: 2 sc, turn and continue on the other side of the starting chains: 2 sc (4)
R3. Fold the arm in half and join the 2 edges: insert the hook in the stitches of both edges and work 2 sl st
Now let’s work the 2 tips of the bone:
(3 ch, 1 sc in the first ch) rep 2 times
Fasten off leaving some sewing yarn and using a needle to fix the two tips to the bone
Carry the yarn inside the stitches bringing it to the opposite end, where it will be sewn to the body
EARS (2 pieces)
1. Using pale green yarn: 6 sc in MR
Fasten off leaving a end for sewing.
ASSEMBLY
Sew the ears between R21 and R23.
Sew the arms between R15 and R16.
We finished!
