
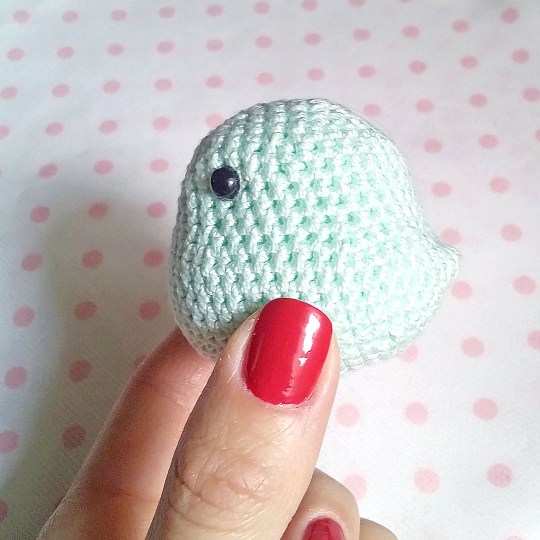
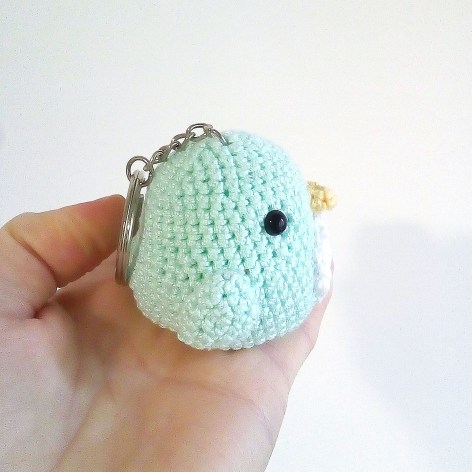
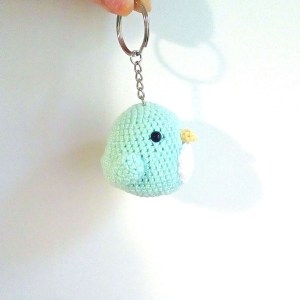
Oggi vi presento uno schema facilefacile (come sempre) per realizzare un uccellino cicciottello color acquamarina che poi ho utilizzato come portachiavi.
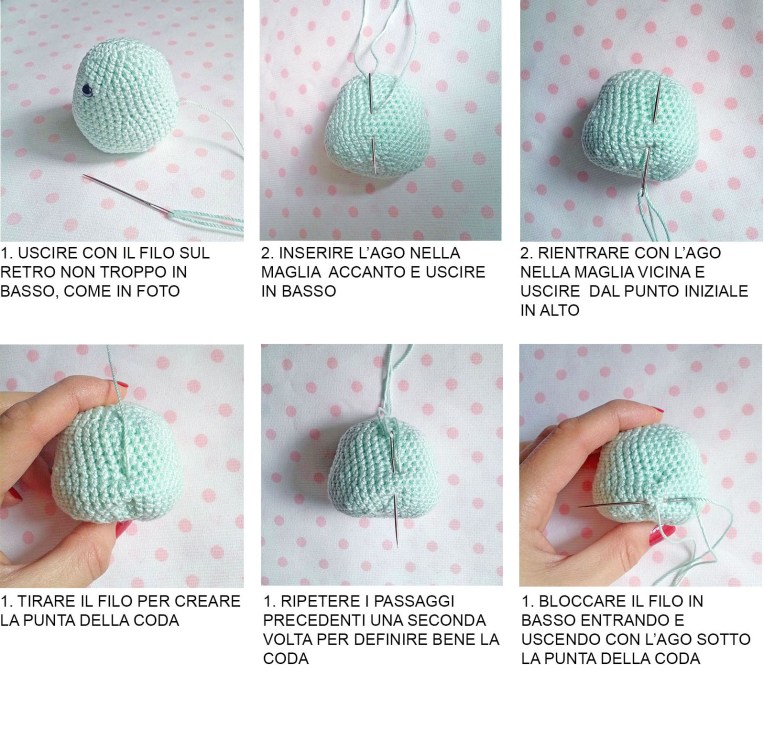
Unico momento a cui prestare attenzione è il quello dedicato alla modellazione della coda che prevede alcuni passaggi che sono illustrati con una sequenza di foto. Inoltre, per semplificare e velocizzare ancora di più lo schem,a potete scegliere di non realizzare la pancia, l’effetto finale sarà assicurato ugualmente 😉
Naturalmente potete divertirvi e sbizzarrirvi a realizzarlo dei colori che preferite 😉
iniziamo!
- filato di cotone di 2 colori: io ho scelto acquamarina e bianco
- filato di colore giallo per il becco
- occhi di sicurezza diametro 6 mm
- uncinetto (in base al filato scelto, io ho usato il 2,5 mm)
- forbici
- ago
- imbottitura in poliestere
Corpo
1. Con il filo di cotone di colore 1 (nel mio caso color acquamarina) lavorare 6 mb (maglie basse) nell’anello magico.
2. 2 mb in ogni maglia bassa: totale 12
3. (1 mb, 2 mb nella mb seguente) x 6 volte: tot. 18
4. (2 mb, 2 mb nella mb seguente) x 6 volte: tot. 24
5. (3 mb, 2 mb nella mb seguente) x 6 volte: tot. 30
6. (4 mb nella mb seguente, 4 mb) x 6 volte: tot. 36
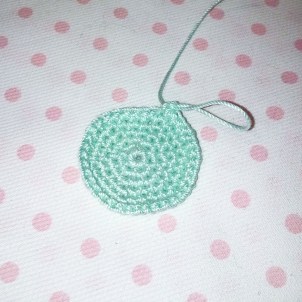
7-10. Lavorare 36 mb (4 giri)
11. (5 mb, 2 mb nella mb seguente) x 6 volte: tot. 42
12. (6 mb, 2 mb nella mb seguente) x 6 volte: tot. 48
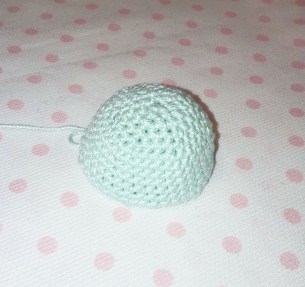
13-17. Lavorare 48 mb (5 giri)
18. (6 mb, 1 dim -diminuzione-) x 6 volte: tot. 42
inserire gli occhi lasciando 10 maglie tra uno e l’altro
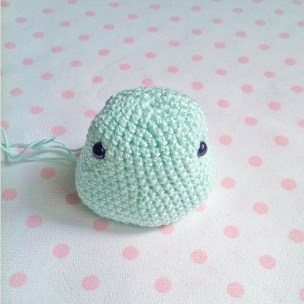
19. (5 mb, 1 dim) x 6 volte: tot. 36
20. (4 mb, 1 dim) x 6 volte: tot. 30
21. (3 mb, 1 dim) x 6 volte: tot. 24
iniziare ad imbottire
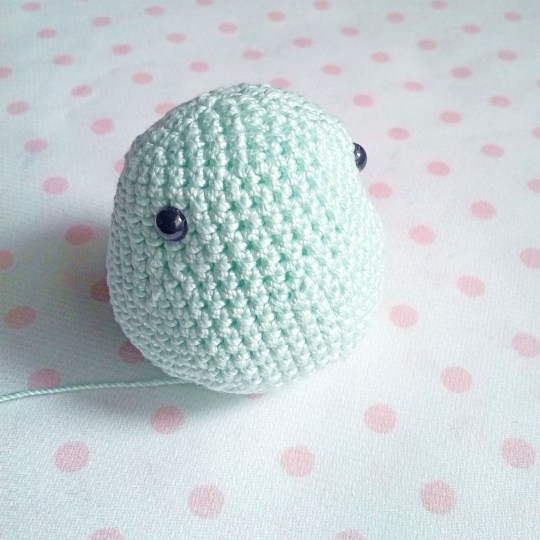
22. (2 mb, 1 dim) x 6 volte: tot. 18
23. (1 mb, 1 dim) x 6 volte: tot. 12
finire di imbottire
24. (1 dim) x 6 volte: tot. 6
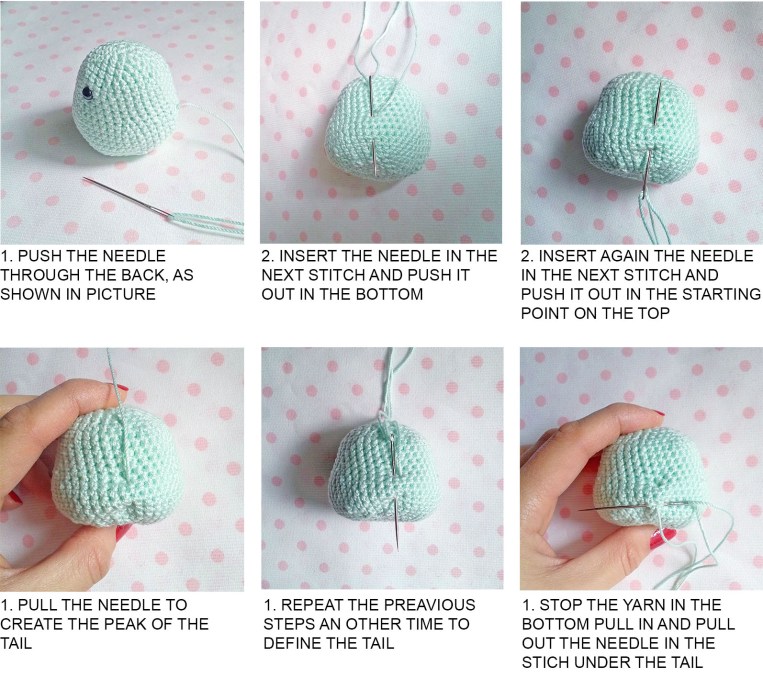
chiudere e lasciare del filo per cucire, (non tagliarlo perché lo useremo per modellare la coda)
Con il filo lasciato in eccesso infilare l’ago e seguire la sequenza di foto sotto per ‘creare’ la protuberanza della coda:
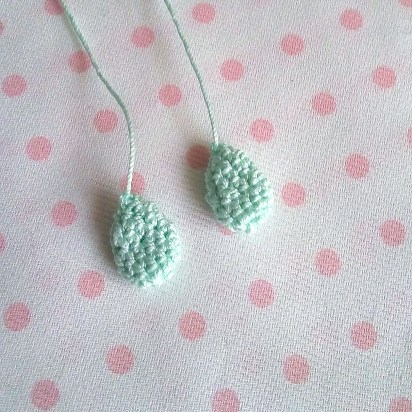
Ali
1. Con il filo di colore acquamarina lavorare 6 mb nell’anello magico.
2. 2 mb in ogni maglia bassa: totale 12
3. lavorare 12 mb
4. (1 diminuzione, 1 mb) rip. x 4 volte: tot 8
5. (1 diminuzione) rip. x 4 volte: tot 4
chiudere lasciando del filo per cucire.
Pancia
1. Con il cotone bianco lavorare 9 catenelle, 1 mb sulla seconda catenella dall’uncino, 6 mb, 4 mb nell’ultima maglia, saltare 1 maglia, 6 mb, 1 aumento: tot 19
2. 1 aumento, 7 mb, 2 aumenti nella maglia successiva, 8 mb, 1 aumento: tot 23 maglie
3. lavorare 10 mb e girare il lavoro
4. lavorare 1 maglia bassissima, 8 mb, 1 maglia bassissima: tot 10, girare il lavoro
5. 1 dim, 4 mb, 1 dim: tot 6 maglie, poi lavorare una 1 maglia bassissima e chiudere lasciando del filo per cucire la pancia al corpo.
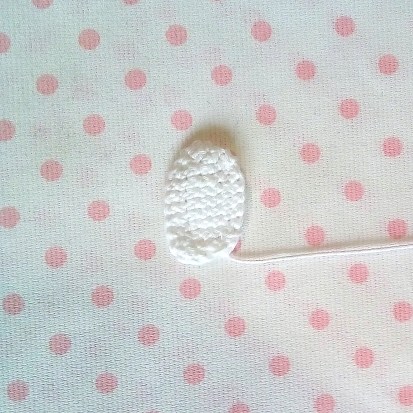
Becco
1. Con il cotone giallo lavorare 4 mb nel cerchio magico
2. (1 mb, 1 aum) x 2 volte, 2 mb: tot 8 maglie
chiudere lasciando del filo per cucire.

Siamo arrivati alla fine, rimane solo da cucire le varie parti al corpo e ta-daaaah!
l’uccellino è pronto!
A presto e stay puff!
ENGLISH VERSION
Materials:
- 2 coloured cotton yarn: I chose acquamarine and white
- Yellow cotton yarn for the beak
- safety eyes 6 mm
- 2,5 mm crochet hook
- scissors
- yarn needle
- fiberfill for stuffing
R1. Using the acquamarine yarn: 6 sc (single crochet) in magic ring. (6 sts)
R2. 2 sc in each sc around. (12 sts)
R3. (Sc 1, 2 sc in next sc) rep 6 times (18 sts)
R4. (Sc 2, 2 sc in next sc) rep 6 times (24 sts)
R5. (Sc 3, 2 sc in next sc) rep 6 times (30 sts)
R6. (Sc 4, 2 sc in next sc) rep 6 times (36 sts)
R7-10. Sc 36 (4 rounds)
R11. (Sc 5, 2 sc in next sc) rep 6 times (42 sts)
R12. (Sc 6, 2 sc in next sc) rep 6 times (48 sts)
R13-17. Sc 48 (5 rounds)
R18. (Sc 6 , 1 dec) rep 6 times (42 sts)
Insert the eyes leaving 10 stitches between them
R19. (Sc 5 , 1 dec) rep 6 times (36 sts)
R20. (Sc 4 , 1 dec) rep 6 times (30 sts)
R21. (Sc 3 , 1 dec) rep 6 times (24 sts)
Start stuffing
R22. (Sc 2 , 1 dec) rep 6 times (18 sts)
R23. (Sc 1 , 1 dec) rep 6 times (12 sts)
Finish stuffing
R24. (1 dec) rep 6 times (6 sts)
Fasten off and leave a long end for sewing, don’t trim it because we’ll use the exceding yarn to model the tail.
With the exceding yarn thread the needle and follow the photo sequence below:
Wings
R1. Using the acquamarine yarn: 6 sc (single crochet) in magic ring. (6 sts)
R2. 2 sc in each sc around. (12 sts)
R3. Sc 12
R4. (1 dec, 1 sc) rep. 4 times (8 sts)
R5. (1 dec) rep. 4 times (4 sts)
Fasten off and leave a long end for sewing
Belly
R1. Using the white yarn work 9 chain, 1 sc in the second chain from hook, 6 sc, 4 sc in the last stitch, skip 1 stitch, 6 sc, 1 increase (19 sts)
R2. 1 increase , 7 sc, 2 increase in the next stitch, 8 sc, 1 increase (23 sts)
R3. 10 sc and turn
R4. 1 slip stitch, 8 sc, 1 slip stitch (10 sts),turn
R5. 1 dec, 4 sc, 1 dec (6 sts), then work 1 slip stitch.
Fasten off and leave a long end for sewing the belly to the body
Beak
1. Using the yellow yarn work 4 sc in magic ring (4 sts)
2. (1 sc, 1 inc) rep. 2 times, 2 sc (8 sts)
Fasten off and leave a long end for sewing.
You’re arrived at the end!
Now it remains only to sew the parts to the body and your bird is ready
See you soon and stay puff!
